[vc_row][vc_column][vc_separator border_width=”10″][vc_empty_space][vc_raw_js]JTNDc2NyaXB0JTIwYXN5bmMlMjBpZCUzRCUyMl9ja18yNzk3NTAlMjIlMjBzcmMlM0QlMjJodHRwcyUzQSUyRiUyRmZvcm1zLmNvbnZlcnRraXQuY29tJTJGMjc5NzUwJTNGdiUzRDYlMjIlM0UlM0MlMkZzY3JpcHQlM0U=[/vc_raw_js][vc_empty_space][/vc_column][/vc_row][vc_row][vc_column][vc_separator border_width=”10″][vc_custom_heading text=”HOW TO PURCHASE YOUR WEB HOSTING AND URL TO START AN ESSENTIAL OIL BLOG” font_container=”tag:h2|text_align:center” google_fonts=”font_family:Open%20Sans%3A300%2C300italic%2Cregular%2Citalic%2C600%2C600italic%2C700%2C700italic%2C800%2C800italic|font_style:600%20bold%20regular%3A600%3Anormal”][vc_empty_space][/vc_column][/vc_row][vc_row][vc_column][vc_column_text]
So if you're here visiting By Oily Design, I’m pretty sure you love reading blogs and if you're on this page maybe you have decided you’d love to give blogging a serious go. Getting started into blogging can seem like a daunting task to someone who is use to just being the audience. But I’m here to let you in on a little secret, in just less than 15 minutes you can have a blog up and running too.
Ok, so now you're saying- “No way I can be a blogger in 15 mins?”, well yes you can!
The hardest part is overcoming your fear. My main goal is to help inspiring people find their voice. And guess what, your one of those people![/vc_column_text][/vc_column][/vc_row][vc_row][vc_column][vc_column_text]
With the three easy steps, I’m going to share with you below, you can have a blog up and running in less than 15 mins. That’s right, 15 mins! no excuses.
Let’s go!
Disclaimer: Please note that some of the links below are affiliate links and I will earn a commission if you purchase through those links. I have used all of the products listed below and recommend them because they are helpful and are companies that I trust.
[/vc_column_text][/vc_column][/vc_row][vc_row][vc_column][vc_custom_heading text=”How to start a blog- the 3 steps to owning your piece of the blogging world.” font_container=”tag:h2|text_align:center” google_fonts=”font_family:Open%20Sans%3A300%2C300italic%2Cregular%2Citalic%2C600%2C600italic%2C700%2C700italic%2C800%2C800italic|font_style:600%20bold%20regular%3A600%3Anormal”][/vc_column][/vc_row][vc_row][vc_column][vc_column_text]
1. Domain Name and Hosting
2. Installing Word Press
3. Making it you!
[/vc_column_text][/vc_column][/vc_row][vc_row][vc_column][vc_column_text]
1. Domain Name and Hosting
Click to open a new webpage to ipower so you can follow along with the instructions as you set up your site!
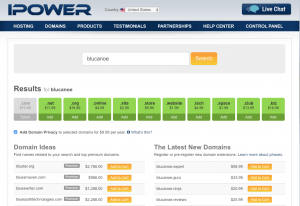
Now let's check to see if your domain name is available. There should be a box that looks like the below. put your first choice of a Web site URL in the box and hit go. For example, I'm going to use the URL blucanoe.com to see what comes up.
[/vc_column_text][/vc_column][/vc_row][vc_row][vc_column][vc_column_text]

Click on the add button under the name you want. I suggest adding Domain Privacy but it's not mandatory. I just like the fact that my personal information is not available for anyone looking into the Domain.
Once you find your Domain name you will move to the purchasing of your web hosting and extras.
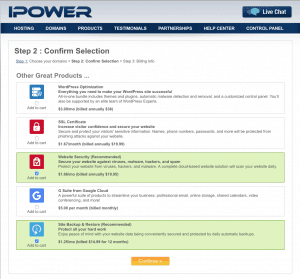
They will ask if you want Site back up and restore and also if you want to add Website security. These are both optional. I personally like the peace of mind they both bring but they are not absolutely necessary and you can always add them later. If you don't want them just uncheck the boxes.

Click Continue
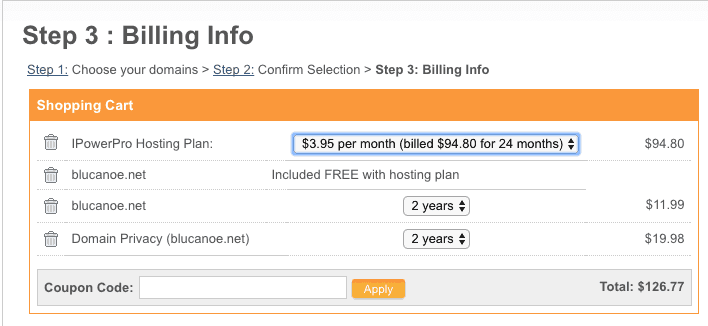
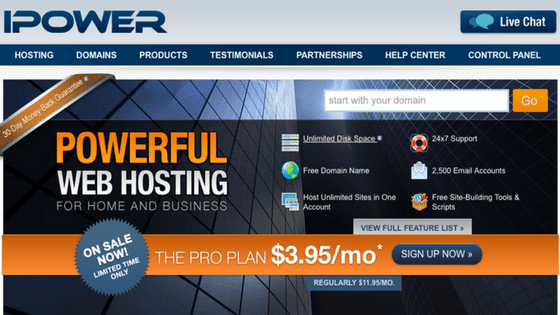
I suggest getting the Pro Plan. With this plan your domain name will be free and it will be unlimited space so you have room to grow. I also strongly suggest paying for 2yrs of hosting, doing so will save you quite a bit of cash.

[/vc_column_text][/vc_column][/vc_row][vc_row][vc_column][/vc_column][/vc_row][vc_row][vc_column][vc_column_text]
2. Installing WordPress
So with completing your registration with ipower you now own a piece of space in the blog world. The next step is building your platform and that means installing WordPress.
There are lots of blog software out there but my favorite is WordPress. It’s the software that I use for byoilydesign.com. What’s great, is that it’s SUPER easy to use and ipower has made simple to install with just one little click. How wonderfully easy is that??
So how do you do it?
Log in to ipower with the login name and password you created when purchasing your hosting plan and domain. Login will take you straight to your web host control panel.
Now scroll down to the Website section of your control panel and click on the WordPress logo.

Click on the install button in the do it yourself section.

Next, select the domain you want to install it to. It will be a drop-down menu just select the only one offered. Leave the Directory box blank. and then click on the “Check Domain” button.

You will get a message that ipower is
“Checking domain, this could take a couple minutes depending on your server.”
Then you will see a window like below, that says: Last step, you're almost there! Click on both boxes. I would then copy the info so you have it on hand for later.

At this time you can set the username and password to whatever you want. Just remember, make your password a tough one to help prevent someone hacking your site.

Believe it or not, you’ve just installed WordPress!
It may take a few minutes for the whole process to finish.
Now go check your email- You will receive an email with all your website info.
In the email, You will see a web address that says- Admin URL. This is the address you will use to login to your blog.
Type your Admin URL into your web browser. You’ll see a login screen like the one below. Enter your Username and Password you copied down earlier.

[/vc_column_text][/vc_column][/vc_row][vc_row][vc_column][/vc_column][/vc_row][vc_row][vc_column][vc_column_text][/vc_column_text][vc_column_text]
3. Making it you!
Congratulations, You are now the proud owner of a blog!!
Now comes the fun part of giving it the look and feel of a personalized blog. Wordpress has lots of free blog templates available that you can check out here.
Or if you're looking for a premium theme. Check out some of my favorite options.
1. Mojomarketplace my current theme is from Mojo and I love how it is super easy to search and install from the ipower control panel. Here are a few of my favorite themes that would be amazing for an essential oil blog.
- Daisy- is a simple and Minimal blog
- Wunderful- is a Clean and minimalistic blog
- Rose- is lovely and easy for a beginner blogger
2. Studiopress– is powered by the Genesis Framework and has tons of great themes to choose from.
[/vc_column_text][/vc_column][/vc_row]


